Monday, April 9, 2012

Second Semester: Week 12

Saxophone mechanisms can be complex. This week we worked on regulation, venting and lost motion. The saxophone is very interesting. Once I grasped the concept it wasn't too difficult. To change regulation on the sax I used a leak light. The leak light allowed me to see where the pad was leaking and which pad was touching the tone hole first. Leak lights are awesome when working on leather pads. They allow me to see where the pad is leaking and where I need to adjust the pad.

The D pad is not touching because the F# pad (not pictured) is touching before the D

I flexed the D foot to regulate it to the F# key and now the pads seal at the same time

Tuesday, April 3, 2012

Second Semester: Week 11

This week we worked on saxophone padding and regulation. Padding a saxophone is a mix between padding a flute and clarinet. We use glue to float the pads but then the glue is used to shim the pad where it needs more thickness to be level to the tone hole. Padding takes patience. Since the pad is so large the glue has to be heated in stages so that it can be warmed evenly and moved around the pad cup. It was easy to overheat the glue and then any changes I made didn't stay because the glue cooled and contracted. I had to figure out when the glue was at it's plastic stage so that it was malleable enough to move and create the outcome I was looking for.

This is what taking the old pad out of the pad cup looks like. There has to be enough glue so that the pad can be moved around to seal

Heating the glue and applying it to the back of the new pad

The new pad is then installed and ready to be put back on the saxophone to be finished and leveled to the tone hole

Monday, March 26, 2012

Second Semester: Week 10

After working on play conditions for clarinet and flute we got saxophones to work on! We received our practice horns. We used these for our exploration and experiments. The first thing our instructor made us do was document how we disassembled it and then put it back together. We documented it because each saxophone is built a little different and needs to be disassembled in the order that works for that particular sax. My classmates and I traded saxophones so that we could see how the different horns needed to be taken apart. We have only started saxophones and next week we get to start padding!

My practice saxophone

Practice saxophone disassembled and keys everywhere

My saxophone screwboard that holds all of the saxophones screws and hinge rods

Tuesday, March 20, 2012

Second Semester: Week 9

Since we are halfway through the semester we switched over to woodwinds. This week was a test of what we all remembered from last semester. We reviewed key fitting, padding and learned about play conditioning. We got a practice clarinet first so that we could replace a few pads and corks. We also talked about the steps to take for a play conditioning and what you should do to be efficient. After the clarinet we received practice flutes where we got to practice padding and corking. It was definitely a good refresher since we have been working on brass for eight weeks.

My practice clarinet

Back to the world of shimming flute pads

Second Semester: Week 8

This was my last week on the brass side. I finished my project trombone early so I turned it in and had the opportunity to work on a customer cornet. The tag said chemical flush and rough out dents. The flush went quicker than the first time I cleaned an instrument. The dents were not too difficult. I gathered all of my acquired knowledge and went to work. It was fun removing the dents and aligning the bell. Since it was basically a playing condition job it was interesting to learn where to stop. Since the repair tag said rough out dents I started by working on all of the accessible dents but I had extra time so I did as many as I could reach with dent tools. I probably wouldn't have had to get out all of the ones I did but it was worth it in the end. I also had to resolder two of the casing to lead pipe braces because they were broken. It was a little nerve racking doing a customer horn but well worth the experience!

Customer cornet

Friday, February 24, 2012

Second Semester: Week 7

This week consisted of more trombone slide work. I worked on practice slide tube dents on a single trombone outer slide tube. After two rounds of practice dents I moved on to a practice hand slide. My instructor put in dents and changed the span and skew of the outer and inner tubes. I had to bring the handslide up to playing condition. I started by cleaning and straightening both the inner and outer tubes. Next, I worked on the span and skew of the inner slide tubes. In order to check the span I looked at the movement of the inner slides after I pulled them out of the outer tubes. Once the skew and span was fixed I worked on the outer tube dents. I started by roughing them out and then finishing them with the steel hammer. As I was working I realized the lower inner tube was out of round and was making it difficult to determine what the slide was suppose to feel like. I brought it back to the best playing condition without burnishing or changing out the tube.

My practice trombone slide. Here there is nothing wrong with it yet, but once my instructor got a hold of it I was in for a treat!

Finally after all that practicing I got to work on my project trombone. I worked on the crook/guard dent. I tried to preserve the guard by pulling it up but the bumper starting ripping the guard so I ended up taking it off.

The crook/guard that is pushed in and needs to be fixed

Tuesday, February 21, 2012

Second Semester: Week 6

This week we continued to work on trombones and focused on trombone handslides. I learned that when working on outer handslide dents it is important to have multiple hammers on hand. To rough out the dent start with the closest fitting slide mandrel inside the outer tube and hit the dent with a raw hide mallet. Then move to a large delrin hammer. Once the dent is roughed out you can move to a nose picker. This helps bring the dents up to surface and can be finished with a steel hammer on a slide mandrel.

I also worked on trombone bell dent work. The main work on this bell was a bell fold.


We also got to hear from band instrument repair technicians that spoke at the NAPBIRT regional conference this past weekend. Scott Mandeville discussed the culture of a workshop and the attitude of technicians. He also talked about the synthetic Omni Pads. Omni pads are a great alternative to bladder pads and can withstand changing climates. Mike Corrigan is a Red Wing graduate that talked to us about trombone handslide repair. It was great to hear how he works on slides and how he makes his own trombones and trumpets. It was very informative day.

Saturday, February 11, 2012

Second Semester: Week 5

This week was a work week for our project french horns but we also learned how to sight trombone slides. Sighting trombone slides can be tricky but once a slide is aligned the action of the slide can be greatly improved. To sight a slide stand parallel to a fluorescent light source. hold the slide up towards the light so that there are two beams of light that follow along the slide. The lines are suppose to be parallel. Where the light bends is where the slide needs to be scooped back into alignment.

The outer lower slide is curving to the left. This is from the handslide perspective

Same slide from the crook perspective. The lower slide is definitely curving in towards the upper brace

Monday, February 6, 2012

Second Semester: Week 4

Dents, dents and more dents! This week I worked on all of the dents in my french horn. I started with the bell and throat dents. I used the knowledge I have gained so far and applied that where I could. I also was able to use new tools specific to the french horn. The french horn can be awkward at times because there is so much tubing.

The bell stem area is heavily dented. The hard part about taking out dents here was that the area had been heavily worked previously.

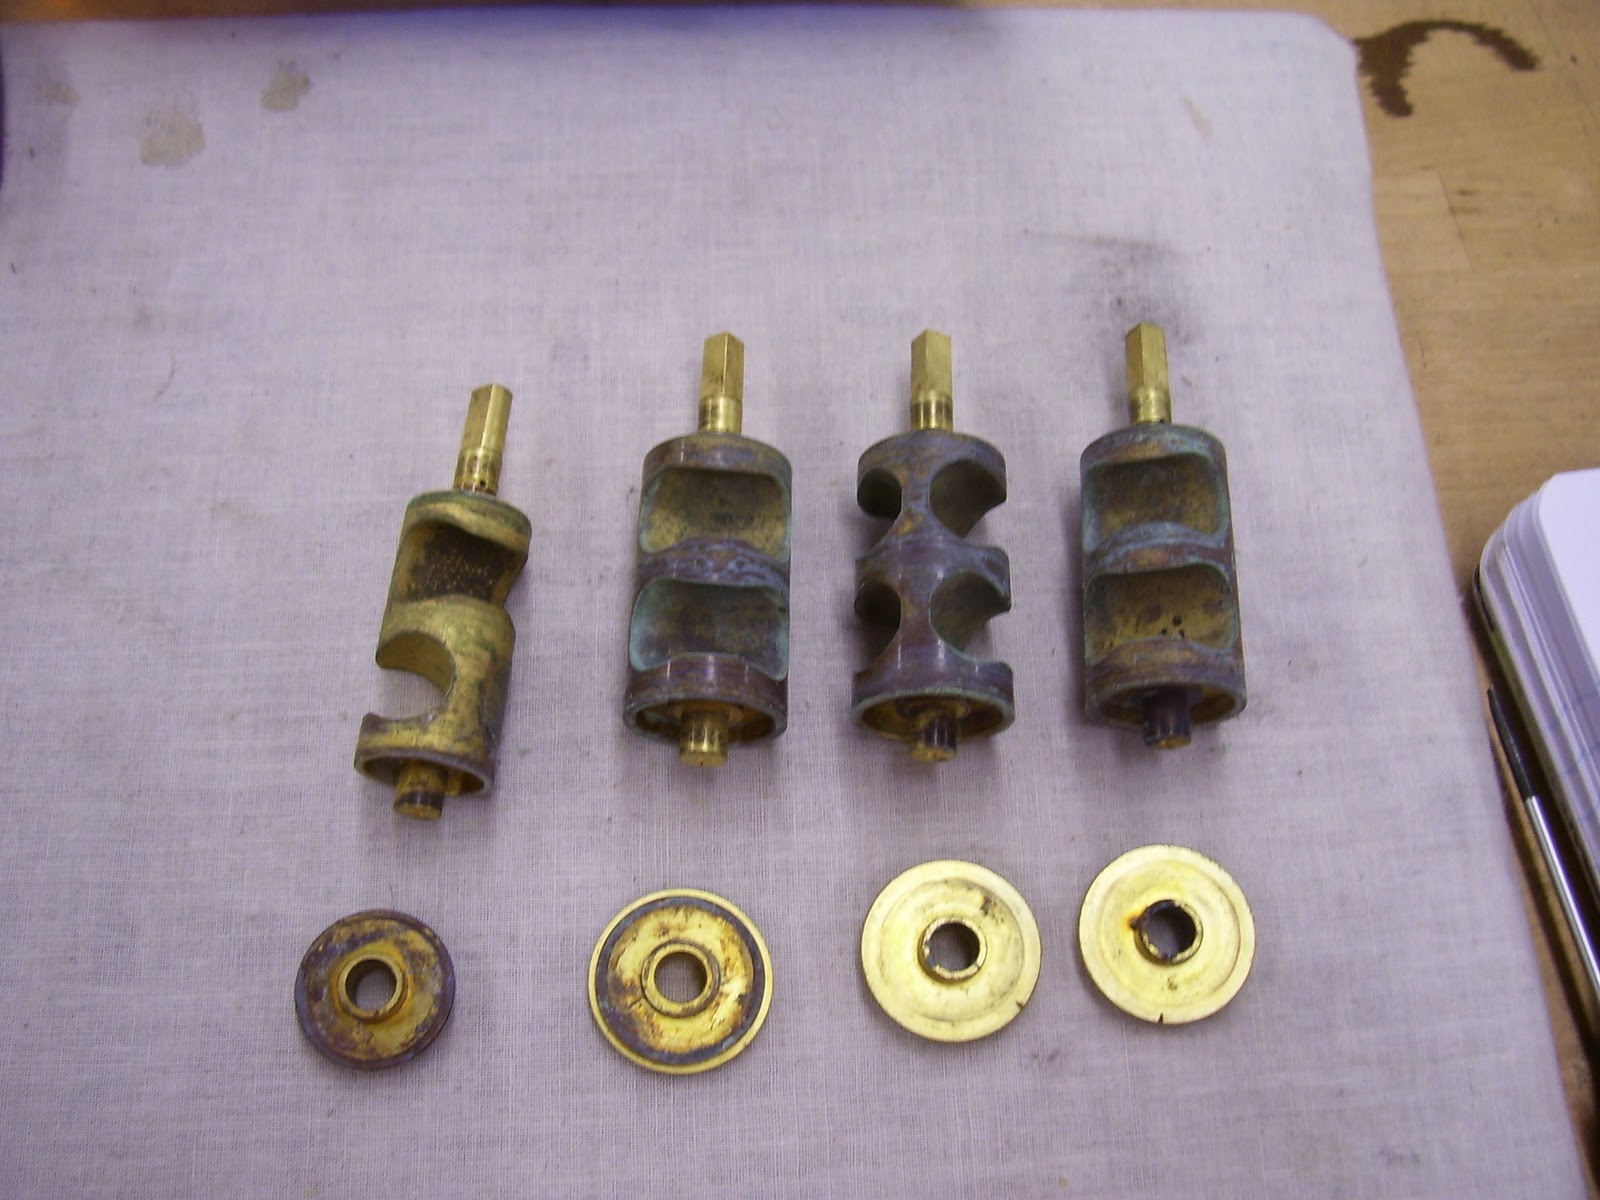
A curved french horn mandrel that fits inside the bell and matches the arch. I put a ball attachment on the end to rebound the deep dents. There are different sized balls and cones that fit on the mandrels

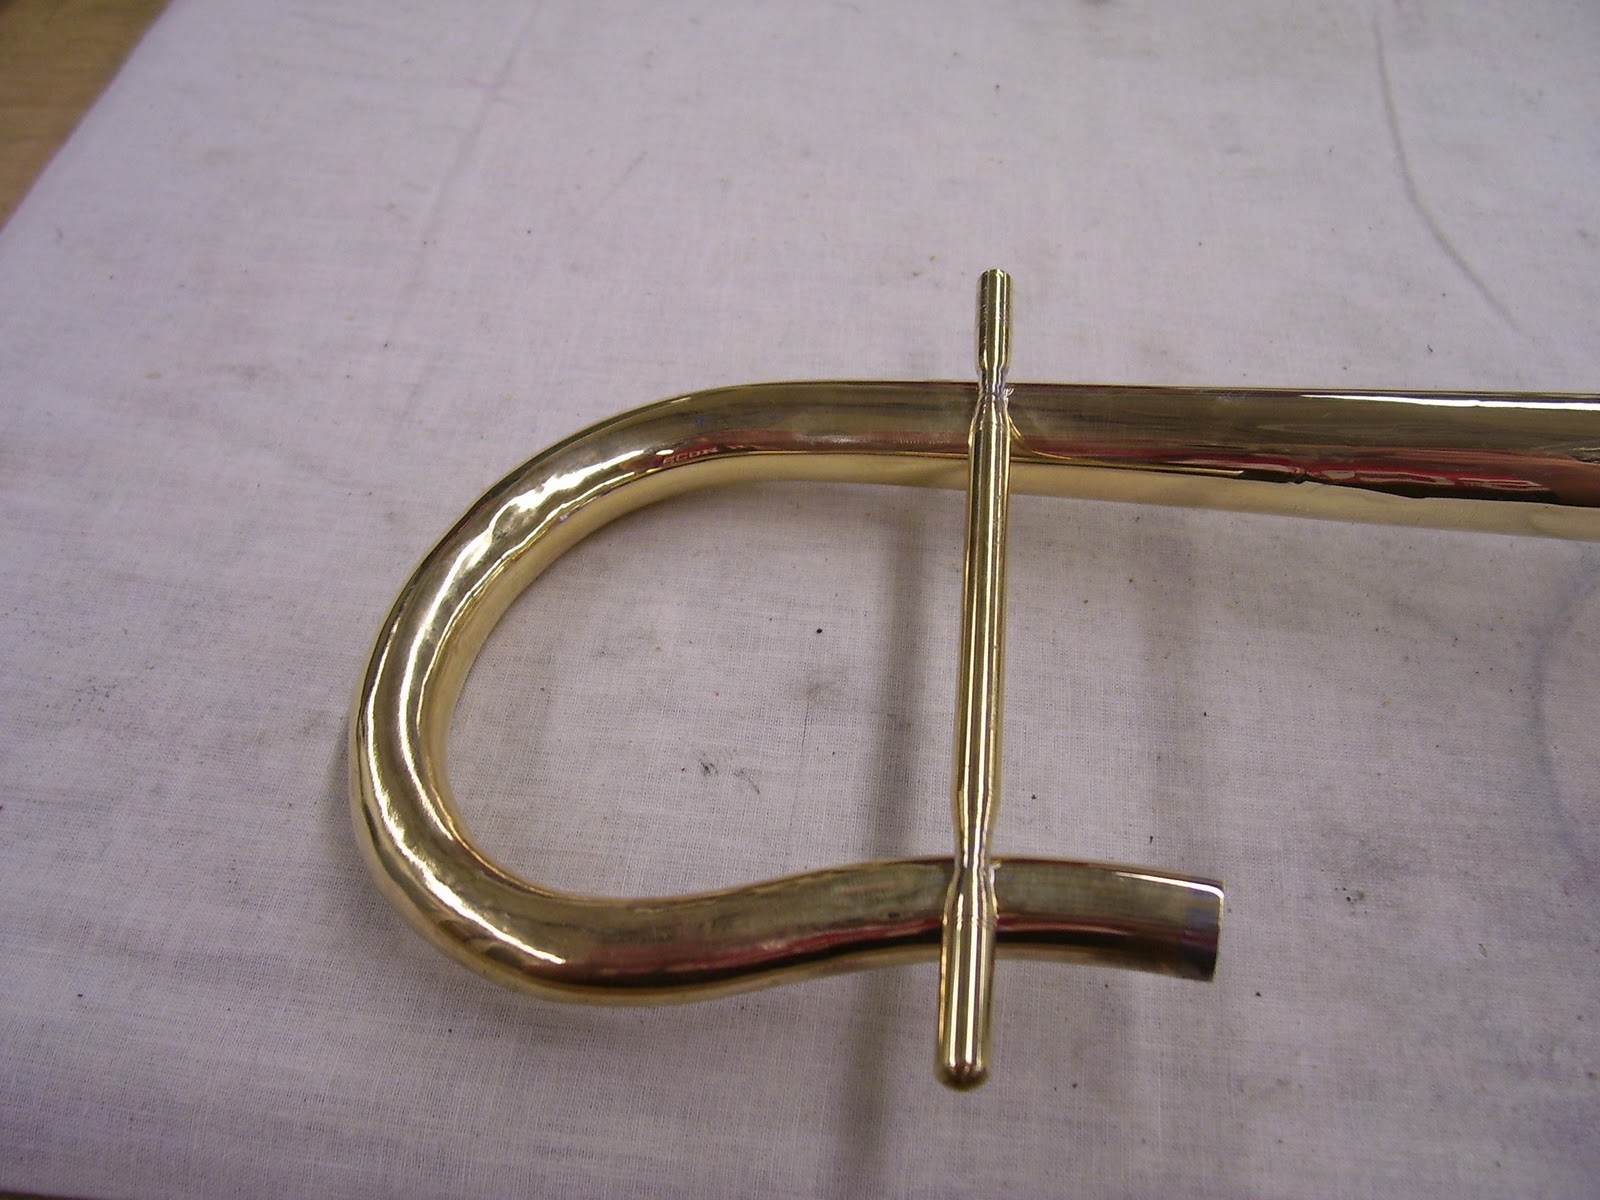
Soldering a 'T' handle to a dent to pull it up

I put the 'T' handle in the vice and pulled up the dent

Another tool that can be soldered to a dent is a dent puller. This one was made by a previous student. The steel stock is used as the force that pulls the dent out

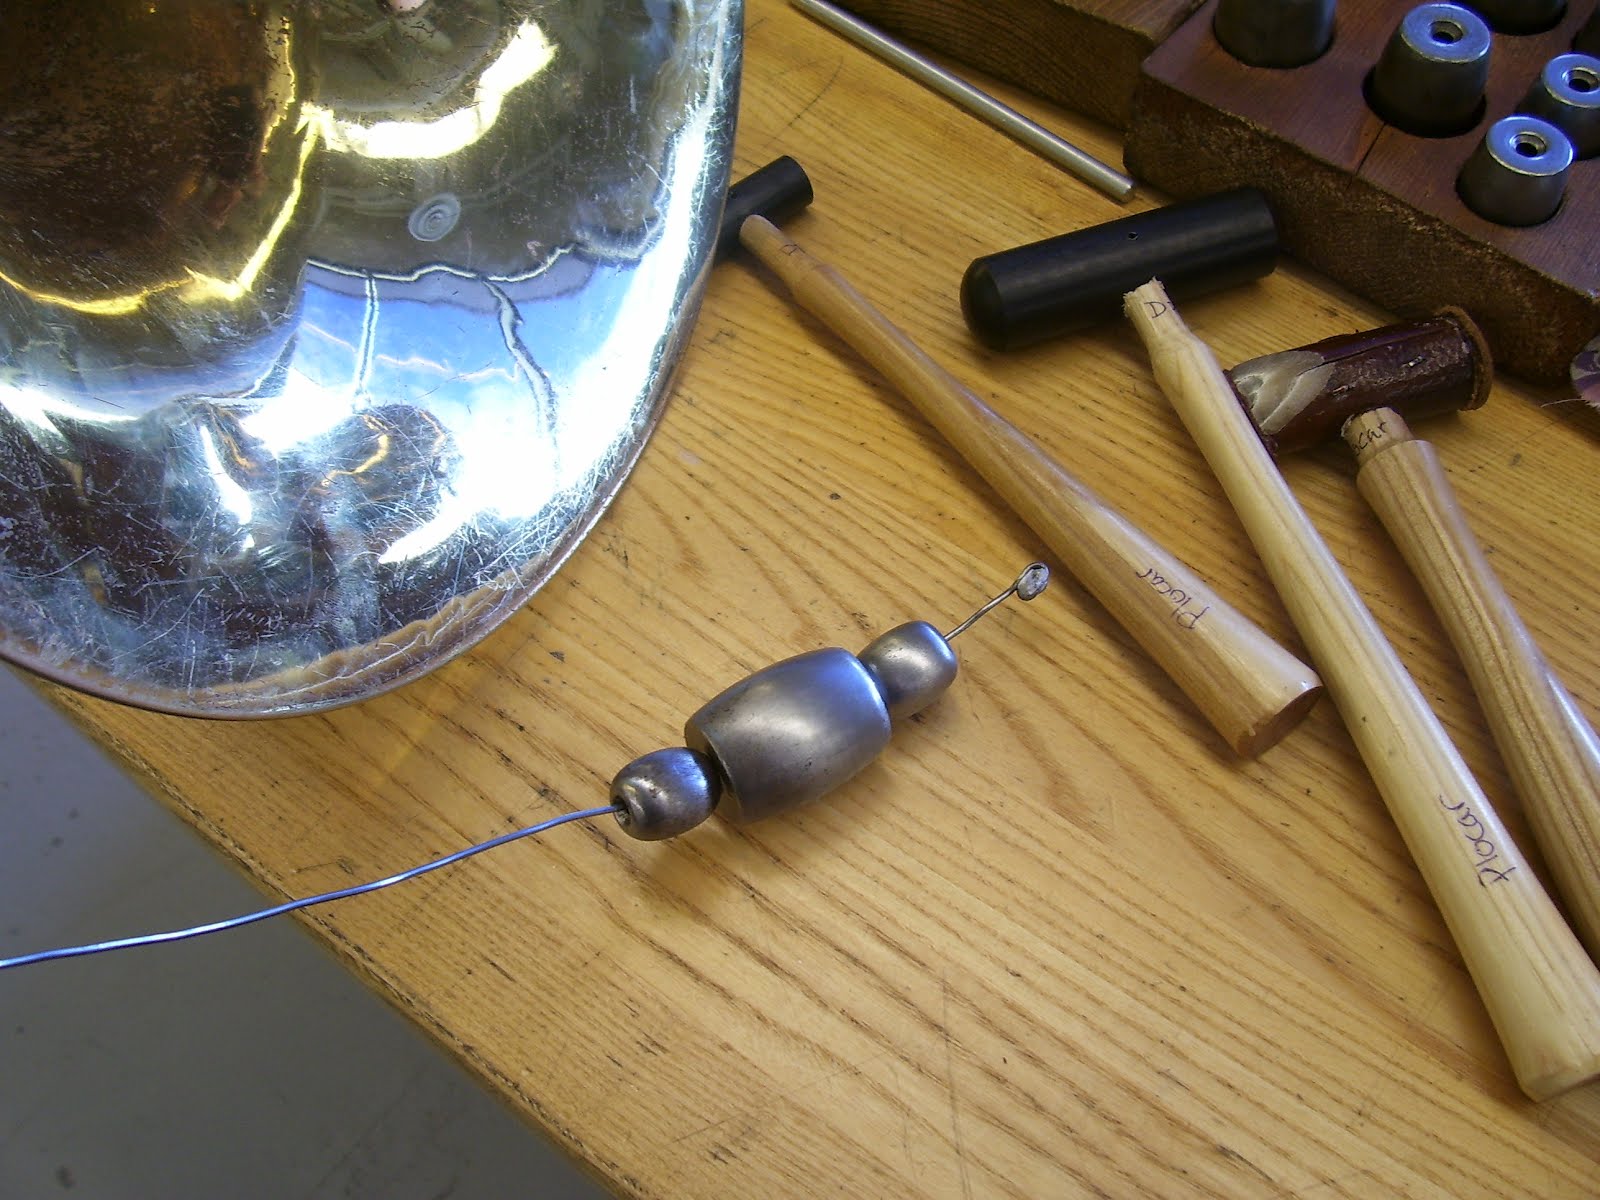
These are larger sized dent balls that come in an A and B set. I worked my way up the throat of the french horn by alternating dent balls

I placed the balls on a wire so that I could force the balls into the horn and then retrieve them

All of these new techniques are vital to taking out dents, especially when the horn has a lot of tubing

Monday, January 30, 2012

Second Semester: Week 3

This week I got my project french horn! The first thing I did was write up the work order slip. Next, I started to disassemble the horn and pre-clean for a chemical flush. I ran into three stuck slides. I put penetrating oil on the slides and set the horn aside to let the oil work. One of the slides came out with some tapping. I tapped the other two but they wouldn't budge. I heated the slides and tried to get them out but that didn't work either. I had to use a drift punch and hammer in order to get the third slide on the F side out. The third slide on the B-flat side came out when I tapped on the spanner brace.

Project horn

Stripped lacquer

Reynolds 

Back side of the horn 
Fourth valve full of corrosion

Scale on the rotors

Parts pre-cleaned and ready for a chemical flush

The slides that were not stuck

Sunday, January 22, 2012

Second Semester: Week 2

This week I learned about casing repairs. This included thread repairs, casing dents and piston action. First I worked on thread repair. The first thing to do with thread repair is to make the casing round. I did this by finding the correct size dent ball that fits in one of the other casings. This allowed me to start with an undersized dent ball and work up to the correct size because there was a lot of damage.

Damaged thread casing

Some of the threads are blown out and some are dented in

Undersized dent ball that I started with and continued to move
up in size to get to the finished size
After the casing was back to round I checked to see if there was damage to the lead thread. In this case there was no damage and I could proceed by using the cap to chase any damaged threads. I put the cap on and once I felt any resistance I tapped the cap with my rawhide hammer. This allowed the threads to form to the threads in the cap. After chasing the threads to the bottom my thread repair was finished.

Finished threads back to round, threads in the cap fit nicely
and the cap is easy to remove
I also worked on casing dents. Casing dents can cause a piston to perform poorly. When working with a casing dent the first thing is to remove the piston as carefully as possible and not cause more damage to the piston or casing. Once the piston is removed I inspected the dent.

Dent on the second casing below the slide tube

The dent is causing the second piston to get
stuck lower than the other pistons

You can see the light reflecting off the raised area where the
dent is

After inspecting the dent I used a ground casing mandrel that coordinated with the make of the instrument and multiple hammers. I started with the rawhide hammer and a utility hammer to hit the rawhide which was over the dent. Then I moved to the small delrin and I finished the area with a small steel dent hammer.

The finished dent. The high spots have been pushed down and
the piston works in the casing

Monday, January 16, 2012

Band Instrument Repair Program News Special

Our BIR program was featured on KSTP channel 5 news On The Road With Jason Davis. He shows what we do in class and how the instructors interact with us. Check out the video by using this link

http://southeastmn.edu/news/blog.aspx?id=2244&blogid=148

Second Semester: Week 1

The beginning of second semester means that we switched back to the brass side. The focus of this semester is getting us ready for bench tests and continuing our learning. We will be learning about rotor valves and trombone hand slides. I received a cornet bell to do a bench test on. I had to solder a patch, take out a bell fold, stem dents and bow dents. We also made two new tools which are explained under the tool tab. French horns were passed out for us to play. We practiced as a class and made some interesting noises. The french horn is going to be fun to play!

Bench test cornet not buffed

Test patch soldered and buffed

Brace added for support when working on the bow

Before the dents were added

My methods french horn I get to play!