When I opened my project trumpet case I knew I was in for a great learning experience! The trumpet was in pieces. The trumpet is a Bundy and it's serial number is 671529 ML.
|
What I saw when I opened the case |
|
The mouth pipe is not attached to the trumpet |
Then I inspected the trumpet for dents and potential problems to fix.
|
Bundy Serial number 671529 ML |
|
Multiple bell throat and flare dents |
|
Second valve slide crook dent |
|
First valve slide crook dents |
|
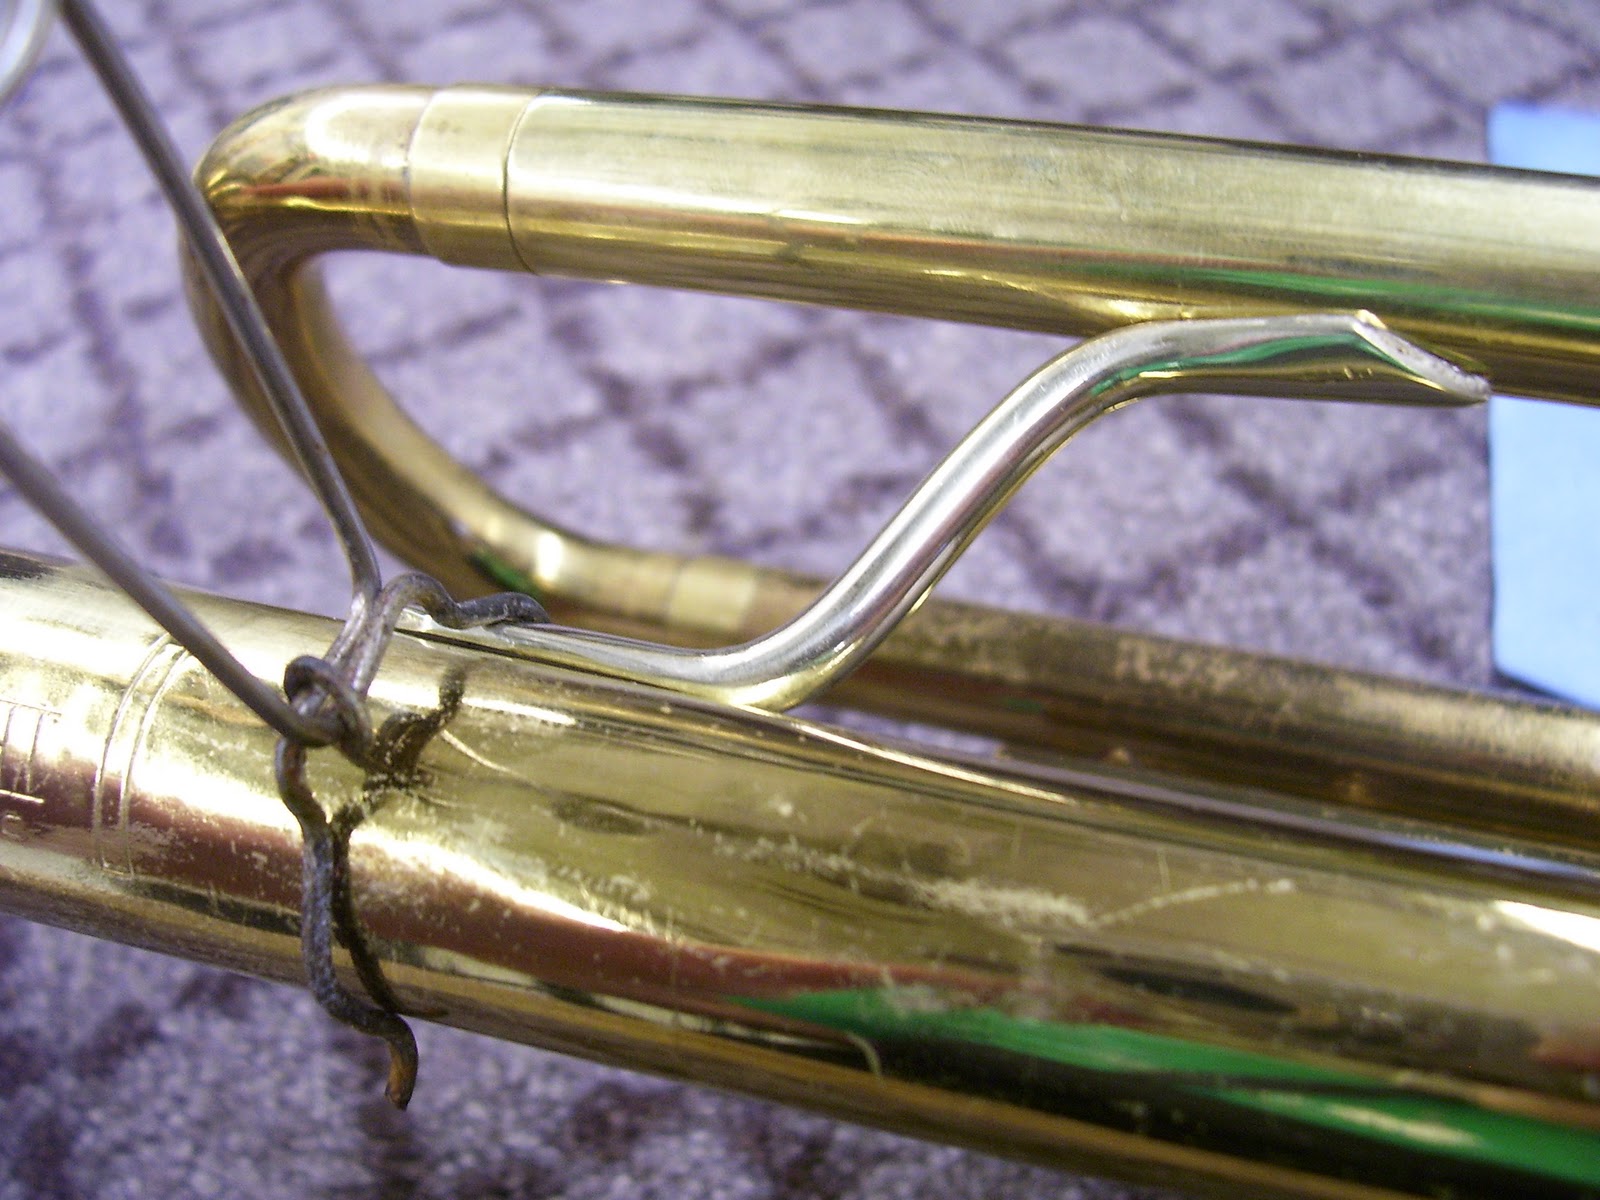
Mouth pipe to bell rear cross brace solder joint broken and dented |
|
Bend in the mouth pipe and broken mouth pipe to second valve casing brace |
|
Finger hook is still intact but the mouth pipe to bell front cross brace solder joint is broke |
|
Mouth piece is stuck in the receiver and there is a large gouge in the shank |
|
Water key assembly and nipple chimney. The springs are not rounded or squared off on the end. This can cause harm to the player because it can get caught on clothes |
|
First valve slide upper knuckle dent |
|
Lime and scale on the inside of the trumpet. It definitely needs a chemical flush |
I have made a lot of progress on my project trumpet these past few weeks. Here is what I have accomplished so far!
 |
| Writing up the tag for what needs to be fixed |
Chemical Flush
I could not wait to get this trumpet clean. I could tell that there was a lot of scale inside the tuning slides. But first I had to prepare the trumpet for a chem flush. This means that I had to swab and degrease the inside of the trumpet. This preparation step is crucial because it lessens the time spent in the chem room.
 |
The first step is to get parts unstuck. I had to use the mouth
piece puller to get the mouth piece out |
 |
| I took apart the water key assembly and removed the old cork |
 |
| Swabing out the instrument |
 |
| The dirty bottom valve caps |
 |
| The scale and lime that has built up in the second slide tube |
Once the instrument has been prepped it is time to move to the chem room
 |
| All of the trumpet parts are ready for the chem room |
 |
| The first part of the bath. Degreasing with Simple Green |
 |
| Now I have to scrub the parts before putting them in the pickle |
 |
| Slide tubes and mouth pipe |
Now that everything has been chem flushed I can start work on dent repair
Dents
There were a lot of dents in this project trumpet. I used all of my knowledge from lecture to remember what tools I needed to use for specific dents.
 |
This dent was on the bell bow where the mouth pipe to bell
bow S brace was |
 |
Bell bow dents removed with the roth tool. The lacquer and
brass were stretched from the dented area |
 |
| The S brace dent on the bow was restored |
 |
| The project trumpet had multiple throat and stem dents |
 |
Knuckle dents were easily removed but I had to be careful
not to blow them out |
Patches
I had to put a patch on the second valve slide because when I was taking out crook dents the brass was weak and there was a hole. I had to cut out a patch and form it to the crook. When soldering the two pieces need to have a great fit.
 |
| In the red circle the brass is weak and cracked |
 |
Annealed brass that I used to make a patch. The "T" diamond
is the template I used for the patch |
 |
| I placed the patch in a mold to help shape it |
 |
I tack soldered it to the crook first so that I could burnish it
to the crook for a good fit |
 |
The newly soldered patch. I soldered it in the trumpet so
that the ferrules wouldn't move when I heated up the patch |
 |
| Getting ready to buff the new patch to color before lacquering it |
Rebuilding the mouth pipe assembly
When I started this project the mouth pipe was not attached to the trumpet and heavily damaged. We decided to put on a universal mouth pipe. When putting on a new mouth pipe the receiver and outer upper main tuning slide tube need to fit the mouth pipe and be straight. In order to do this I had to add brass shims to both ends.
 |
| The old mouth pipe that was dented and bent |
 |
| I took off the receiver and outer upper main tuning slide tube |
 |
| The new universal mouth pipe |
 |
| I cut the mouth pipe to length with a pipe cutter |
 |
| Using the pipe cutter to trim the mouth pipe |
 |
I used a mouth pipe flaring mandrel to flare the small end of the
pipe so that it would fit snug on the receiver |
 |
| adding brass shims to fill the gap |
 |
| The mouth pipe shimmed and straight, ready to solder |
 |
| Soldering the pieces together |
 |
| Getting ready to solder the casing to mouth pipe brace |
 |
When filling the solder joints I put the trumpet like this so the
mouth pipe was sitting on the brace and I could fill the joint
like a cup. I used gravity to my advantage |
 |
| The finished soldered mouth pipe to casing brace |
 |
| Next I had to fit and solder the S braces |
 |
| Again I used gravity to my advantage and filled them upside down |
 |
| More S brace solder joints |
 |
I filled the joints at the base of the foot to create an easy
feed point |