Tuesday, December 27, 2011
Week 17
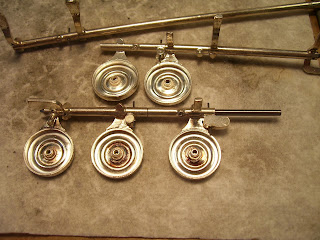
This week was a work week. I was working on finishing body work and padding on my project flute. I continued to pad and once I finished the body I put it in the pad oven to put a seat in the pads. While the body was in the oven I finished padding the foot joint. The flute went in the pad oven for 15 minutes with the pad clamps in place. Then I took it out of the oven and the clamps remained on for an hour. Once the hour was up I removed the clamps and let it sit for another hour so the seat would have time to relax and then I could check for any leaks that were still present. After the padding was done I had to finish up my tenon fitting. The head joint was back into round but it did not slide in the socket evenly. I also had to expand the lower tenon because the footjoint was loose. Once the body work and padding was done I corked the keys, fixed regulation, created venting and removed lost motion. These were the last steps I had to complete before turning in my project.
Monday, December 12, 2011
Week 16
Flute padding was the focus this week. Flute padding is different than clarinet padding because the majority of pads are not floating on glue. They are placed in the pad cup and are shimmed with paper or mylar shims to make it seal to the tone hole. Flute pads are made of woven felt, a cardboard back and a skin covering over the top. When padding, install the key to check the pad cup for levelness. If it isn't level to the tone hole flex the cup level to the tone hole first so that you only have to shim for inaccuracies in the pad. Shims are all different thicknesses ranging from 0.001" to 0.010". Shims are used to build up an area of the pad that is not touching the tone hole. To figure out where to put shims I used a feeler gauge of 0.001" thickness to check around the tone hole for drag. Where there was not any drag was a spot I needed to add a shim under the pad. Padding takes time, patience and practice.
Week 15
After Thanksgiving we started working on flutes! We started by learning the regulation sequence followed by the venting and lost motion on a flute. There are more regulations on a flute than a clarinet, but they are easier to fix because the keys have regulation (adjustment) screws. Lost motion and venting are regulated by a foot cork touching the body. When working on regulation, lost motion and venting the first step is to establish the venting on the F key by adjusting the foot cork because this key controls venting for the lower stack and half of the upper stack. We also learned about pinned keys. Knock pins should be tapered and are in the B-flat key, D key (depending on the model), E key, F key, and trill keys. Pins should be removed on a clean, oil, and adjustment to make sure there is no rust in the key and to replace the old oil. Once they are removed the keys may be cleaned thoroughly and pins may need to be replaced depending on the situation. I replaced all of the pins on my project flute so that it would be easier for the next technician to work on.
 |
| Flute pin remover |
 |
| Old pin in the D# trill lever |
 |
| Pin replacement kit |
 |
| Kit comes with reamers, new steel pins and a drill bit |
 |
| Replacing the old pin with new steel |
 |
| Other pinned keys where the pins were replaced |
 |
| Close up of the D# trill lever. The pin still needs to be ground down |
Subscribe to:
Comments (Atom)
