Monday, September 26, 2011

Week 5

The moto of this week was "Things that get stuck." I learned about all of the different parts of a trumpet that can get stuck and how to get them functioning again. On a trumpet there are many parts that get stuck on a regular basis. These parts are: the mouthpiece, valve caps, tuning slides, and finger buttons. The first thing techs do to stuck parts is to apply penetrating oil. This oil needs to sit on horns for an hour to 24 hours. The more time it has to sit the more it will penetrate between the two stuck parts. Penetrating oil works best on places where lots of moisture passes through, like tuning slides. Another technique is to use vibrations to knock the seized parts loose. This is most effective on valve caps and tuning slides. If these two techniques are ineffective it is best to use a heat and cool method. This method allows the stuck parts to expand and contract and break the seal. When workng with stuck parts it is always good to use a twisting motion to help break the crud that is built up between parts.  For each stuck part there are a series of options to try. It may take a week for a part to come loose but don't give up!


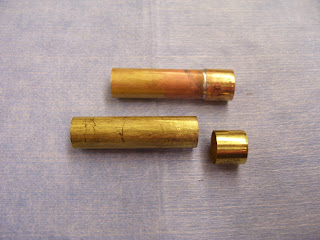
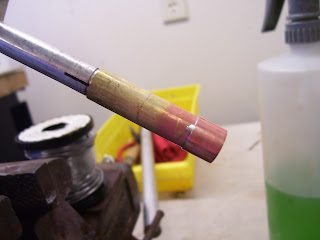
On my project trumpet the 2nd valve slide is stuck

Also, the mouthpiece is stuck in the receiver, common problem

Sunday, September 18, 2011

Week 4

This week I learned about the removal of trumpet bell stem dents and constructing tuning slides. When removing stem dents I used a tapered universal trumpet mandrel and drew out the dents. It is important to put lubrication on the mandrel so that the drawing can be done without scratching the brass. When setting the trumpet on the mandrel it is important to measure how deep the mandrel needs to be to reach the dent. My hands need to be placed on opposite ends of the trumpet so that I am in total control to draw out the dent. During the week I also built a first tuning slide from a crook, two ferrules, and two inner tubes. This was also another soft soldering exercise that was awesome! All of the parts needed to be clean in order to solder them together. In order to solder these small pieces together I used an expander to hold the parts and then used a trumpet as a fixture when soldering so that my tubes would be parallel and even.

The pieces of a first valve slide. The crook, two ferrules and
two inner slide tubes

The ferrule with a counter bore to receive the crook

The crook

One ferrule and inner slide tube soldered together

Using the expander to hold the inner slide tube while soldering
on the ferrule

The soldered ferrule to inner slide tube
Both ferrules and inner slide tube soldered and tinning
sanded in preparation for soldering the crook
Using the trumpet as a fixture

Setting up the tubes in the first valve slide

Using a straight edge to line up the parts
The top joint has been soldered
Excess solder because the part was too hot
Soldered first valve slide
Placing the valve slide on an expander for hand buffing
Finished hand buffing
Final buff using yellow rouge
Looks just like it would from a factory
Tubes are parallel 

Sunday, September 11, 2011

Week 3

This week I had my first project on the lathe. I learned how to face, drill and de-bur an object. The tool that we made was a rotor bearing plate seater. It was made of PVC plastic and allowed us to become comfortable with using the lathe. I used a right handed tool bit to face the plastic. Lathes are commonly used in machine shops for precision and accuracy. I learned how to figure out the proper speed that the lathe should be running at. For plastics it is 400 divided by the diameter of the object. When facing an object it is important to make sure the tool bit is centered with the part. To do this I set up the bit using a dead center and then placed the plastic in the chuck. I faced the part for the first time and the bit left a center nub, this meant that the bit was lower than center and I had to raise it. Once I found center the piece did not have a nub, which was perfect! After facing I had to bevel the edge with a file to take off and burs that were left on the part. Lathes are wonderful tools for band instrument repair techs to have in their shops. They provide endless possibilities for tools and repairs.


Week 2

This week I spent a lot of time in the buffing room. I learned the proper way to buff trombone bells.  When buffing there is cut buffing and color buffing. Cut buffing is to remove surface scratchers and soft solder tinning. The most common compound we use is called Tripoli. Color buffing uses rouge which takes out the smaller scratches and brings brass to a mirror finish. There are three colors that we use in the shop: yellow, green and red rouge. When buffing the trombone bell we started by taking off the lumps of soft solder by heating up the solder and wiping the excess off. After cleaning off the solder I taped off the serial number and engraved logo. Taping these areas off allowed for the engraving to be kept intact because the buffing wheels remove brass in the process. Once the bell was taped I marked the bell with arrows so that I knew which way the buffing wheel was suppose to move around the bell. Then I moved to the buffing room where I started on the inside of the bell and worked my way to the outside. The end product was a mirror finish which will be helpful when removing dents later.

Thursday, September 1, 2011

The brass shop at Minnesota State College Southeast Technical-Red Wing, Minnesota

Week One

Hi and welcome to my Blog about my Band Instrument Repair Class! I have started a wonderful journey in Red Wing, Minnesota that has allowed me to meet people from all over the country with the same interests as me: fixing band instruments! I have enjoyed my first week in the brass shop and am learning so much! We have already made tools and taken lots of notes on safety precautions. What I am learning will not only lead me to a job in a shop but also supplement my music education degree. Working with band directors to enable a horns longevity is crucial to a student's musical career. I will be posting pictures of what we are doing in class and the project instrument I am working on! Feel free to comment and post questions!