The project flute I work on was an Artley 18-0 model. When I did the first inspection I filled out a sheet on venting and what materials I would use when I put the flute back together. I also made a note about end play and lateral play in the keys. The tenons were loose and the beauty ring on the end of the foot joint was pushed up onto the foot because the solder joint was broken due to it getting hit by something. The head joint had multiple dents and scratches. The body and foot joint didn't need much body work. I chemically flushed the flute and made sure to take apart all of the pinned sections before doing so. After it was clean I was ready to do mechanical work. Once the keys were in proper working condition I polished the keys and got ready to pad. Padding was a learning process. I started to gain predicability when adding shims. I still need more practice but I started to get faster as I kept doing it. After it was padded I corked keys, set the venting for the F key and then regulated. I skipped one regulation (not realizing it) and moved to venting and lost motion. Since I missed one regulation I couldn't get rid of some of my lost motion. After a lot of brain storming I figured out that I skipped a step and had to go back and fix that first. This flute was a great learning experience and I cannot wait to work on more!
 |
| This is what was on the case when I started! I knew it would be fun |
 |
| What it looked like in the beginning |
 |
| I dissasembled the flute, took out the pads, and taped them to this leak chart. There were no shims in the pad cups so they must have used a pad oven to seal the pads |
 |
| All of the dirt and tarnish on the flute body |
 |
| Very dirty |
 |
| Out of the chemical room and looking very nice |
 |
| All of the tarnish was removed. The last step of the process was using silver dip to remove the rest of the tarnish |
 |
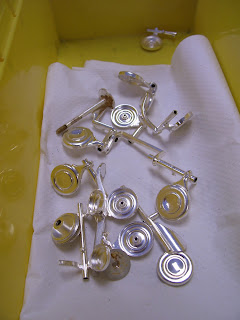
| Clean keys |
Once I finally got the pins out of the keys they were unable to be used again. They were too short and needed to be replaced. I used the pin replacement kit from JL Smith.
 |
| Pin replacement kit from JL Smith |
 |
| The kit includes broaches to ream out the holes, new pins that can be trimmed to length and a drill bit to make new holes |
 |
| Another part of this project was tenon fitting. This is the end of the headjoint that is out of round and dented |
 |
| This is the tenon swedging die. I used it on the head joint and foot joint tenon |
 |
| I used this head joint expander along with the swedging die to make sure the tenons were round and fit properly |
 |
| The assortment of expanders and swedging dies |
The beauty ring on the foot joint was pushed up and the tube was out of round. I first took off the ring and made the tube round. I then put the ring back on and soldered it back in place.
 |
| This is the foot joint. The solder joint on the beauty ring has broke and the ring has been pushed up the foot. Also the tube of the foot has been dented from exposure |
 |
| Showing the out of roundness of the end |
 |
| The beauty ring was taken off so that I could make the tube round |
 |
| I rounded out the tube and made sure the ring fit. I then soldered it back on with a lead free solder because the color of lead free matches the silver plate better than other solders |
 |
| I used a little too much solder |
 |
| Foot joint after buffing and removing excess tinning |
 |
| Polished inside and out |
 |
| Before padding I polished the keys and body with Tarni-shield. It polished and prevents keys from tarnishing as fast as they would in normal conditions |
 |
| The upper keys have been polished and are shiny. The bottom key and lever have not been polished yet and are still dull |
 |
| What my desk looked like while I was padding and corking. There are shims, pads, and sand paper everywhere! |
 |
| This is the low C key and roller. There is a full 0.002" shim that is placed under the pad to level the pad. Then partial shims are added depending on where the pad is unlevel. |
 |
| After the flute pads are level and sealing I clamped the pads and put them in the pad oven to create a seat in the pads |
 |
| This is the foot joint in the pad oven. We used a mailbox and 60 watt lightbulb |
 |
| While the pads were seating I installed the new head cork |
 |
| The finished product! I was pleased with how it turned out |

