My project clarinet was a Selmer Bundy, Resonite model. First I inspected the clarinet and wrote down any damage that I would need to fix.
 |
| Project clarinet |
Along with the inspection I recorded the pad protrusion and cork thickness. This clarinet was missing corks and some of the pads were chewed up so I wrote down what it was and also what I wanted to put in when I was finished. By doing this before time it allowed me to save time when I was putting the clarinet back together.
 |
| No tenon cork |
 |
| Broken tenon cork |
 |
| Chipped tenon |
 |
| Needs a chemical flush! |
 |
| Scale built up on the keys |
 |
| Dirty body |
 |
| Dirty tone holes |
 |
| Scale build up on the keys |
After the inspection I took the clarinet apart to do the pre-clean and get it ready for the chemical flush.
 |
| The keys ready for the chemical room |
 |
| Pre-cleaning the body and tone holes with a cotton swab |
After the chemical flush the body and keys were much cleaner and rid of scale and lime build up.
 |
| Clean tone holes and body! |
 |
| No more flakes of dirty and grime |
 |
| Clean keys. There is still some scale staining. But much cleaner than before |
 |
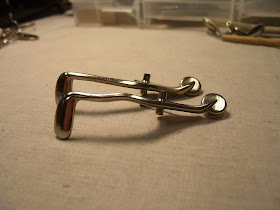
| These are the swedging collets that I use to swedge the keys to thin the hinge tube metal, which makes the key longer and takes out end play |
 |
| As I was key fitting I found a post that was loose. If I tightened it all the way it made the hinge rod go in at an angle. |
 |
| To fix this I removed the post from the body |
 |
| And wrapped unwaxed dental floss around the post that threads into the body. This filled the space and allowed the post to tighten and make the rod go straight. |
Buffing, Padding, and Corking
 |
| After all the keys fit I buffed them. They are so shiny! |
 |
| Heating up the glue to put in the pad cup |
 |
| Warming up the pad cup with glue in it |
 |
| Once the keys were padded it was time to cork them. This is the A-flat/E-flat key with a piece of oversized cork contact cemented to it |
 |
| Then I rough trim the cork to the touchpiece |
 |
| Final cork cut with a bevel. Now I can sand it to reach the proper venting for that key |
Tenon Corks
After key fitting, padding and corking is done I finished by putting on the tenon corks. I cut the cork in a strip that fit the tenon and then contact cemented it to the tenon. Next, I sanded the cork so that it would fit the tenon socket. Once the parts fit I sealed the cork with paraffin wax.
Fixing the chipped tenon
Sealing the cork
After key fitting, padding and corking is done I finished by putting on the tenon corks. I cut the cork in a strip that fit the tenon and then contact cemented it to the tenon. Next, I sanded the cork so that it would fit the tenon socket. Once the parts fit I sealed the cork with paraffin wax.
 |
| Clean tenon that is ready for cork |
 |
| Strip of cork that has been softened and starting to curve |
 |
| Bevel placed on the end which allows the cork to lay nice at the seam |
 |
| The seam where the cork overlaps |
 |
| Sanding the cork and seam down to size |
Fixing the chipped tenon
 |
| Chipped tenon on the lower joint that fits into the bell |
 |
| Two part Armstrong epoxy and black ink |
 |
| Mixing the epoxy and ink to the right color and consistency |
 |
| Applying the epoxy and using blue tape to mark off where it needs to go |
 |
| Baking the epoxy in the mailbox oven that is heated by a light bulb |
 |
| Once the epoxy was dry I filled and sanded down the extra |
 |
| Finished sanding and now it looks like a tenon again! |
 |
| Putting paraffin wax on the tenon to seal the cork. Then I heated it with the torch to melt the wax |
 |
| I did one more wipe down of the body and keys with pledge to finish off the clarinet |
